
Contacts
- Jeanetta Sims, NCA First Vice President
- LaShawn Duckett, Director of Convention and Meetings
- Aliyah Hyman, Convention and Meetings Associate
- 2024 Program Planner Contact Information
- 2025 Program Planner Contact Information
- General Inquires, convention@natcom.org
Additional Information
- Professional Standards for Convention Participants
- Anatomy of a Call for Submissions
- A Code of Professional Ethics for the Communication Scholar/Teacher
- Step-by-step Reviewer Guide (Coming Soon!)
- Donald P. Cushman Memorial Award Call for Nominations
- Guest Speaker Registration Form - Due October 14, 2023
- March E-Mail Text
- Additional Slot Request Form (Accepting applications from May 10-June 6, 2024)
Convention Planner Training Webinars
Note: Convention Central is getting a new look!
NCA is in the process of migrating to a new abstract management system. As such, the training material is in the process of being developed. As we move through implementation, training information will be updated below.
Convention Planner Info Session / Training I
This session will discuss where we are with the implementation process, updating/crafting your call for submissions, the new review feedback forms, and soliciting a reviewer.
View Recording
Convention Planner Training II
This session will cover submitting a proposal, managing your submissions, and populating your reviewer pool.
Submit a Proposal Using the Chair Module
Edit a Submission Using the Chair Module
Convention Planner Training III
Detailed instructions on how to add and assign reviewers, and transfer submissions will be given.
View Recording (refer to minute marker 06:03-7:00 for instructions on how to transfer submissions)
Convention Planner Training IV
Detailed instructions on submission management and best practice strategies using NCA Convention Central.
Convention Planner Training V
Detailed instructions on how to assign reviewers, monitor reviewer statuses, and issue final statuses (accept/decline) submissions.
View Recording
How to Issue Final Statuses & Organize Sessions
Additional Slot Request Form (Accepting applications from May 10-June 6, 2024)
Convention Planner Training for Planners Who Did Not Issue a Call for Submissions
This webinar is specifically designed for planners who did not issue a call for submissions and/or did not take submissions via NCA Convention Central. Detailed instructions on how to create sessions for your unit will be given.
Q: How do I add session chairs and respondents?
A:
- Log in to Convention Central.
- Access the Chair Module.
- Click on “Program” in the left side menu.
- Find the session you want to manage and click on “Manage”.
- Click on “Session Chairs” in the blue menu bar.
- Click on “Add New”.
- Type the last name of the chair or respondent in the "Contact" field.
- Select the desired role (chair, cochair, or respondent) in the “Chair Type” section.
- Click “Add Chair”.
Q: How do I communicate to NCAs Convention Team my desired session preferences (e.g. desired day, time of day, estimated attendance, etc.)?
A:
- Log in to Convention Central.
- Access the Chair Module.
- Click on “Program” in the left side menu.
- Find the session and click on “Manage”.
- Scroll down to the “Additional Details” section.
- Enter your desired details, such as preferred day, time of day, estimated attendance, etc.
- Click "Update Session" to save the changes.
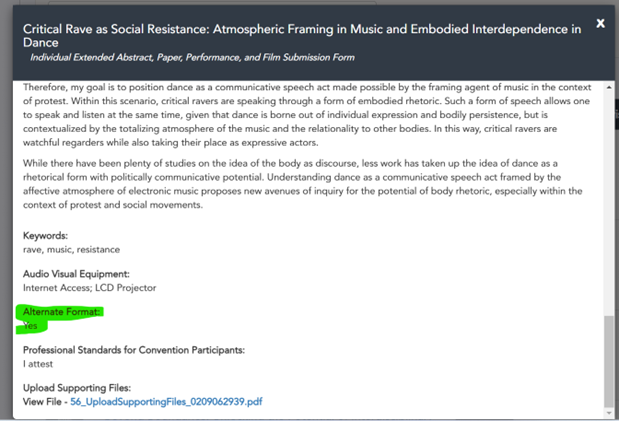
Q: How will I know if an individual paper should be considered for the Scholar to Scholar session?
A: During the submission process, we asked individual paper submitters if they were willing to have their submission considered for presentation in a Scholar to Scholar session. You can find this information in the "Alternate Format" section of the submission details.
When viewing the full submission details (by clicking on the submission name), look for a "yes" or "no" response in the "Alternate Format" section. This indicates whether the author agreed to have their paper considered for the Scholar to Scholar session.
.
Q: I feel that a submission might intersect with another unit and should be co-sponsored by that unit, how do I add the applicable unit as a co-sponsor?
A: If you feel that a submission might intersect with another unit and should be co-sponsored, you can contact the co-sponsoring unit's planner to see if they would be interested in co-sponsoring the submission. Once the co-sponsoring unit approves, you can edit the submission to include the co-sponsor. Co-sponsored programs will count against the allotment of the unit listed as the first sponsor.
- Log-in to Convention Central.
- Access the Chair Module.
- Click on “View Submissions”.
- Select the applicable module from the dropdown menu.
- Click on the submission number (highlighted in blue) next to the submission name.
- Click on “Edit Submission” in the blue menu.
- In the “Co-sponsorship Request” section, add or remove the applicable co-sponsors. Remember, planners of the co-sponsoring unit must approve the co-sponsorships.
- Click “Update Submission”.
Q: A submitter or reviewer recommended a co-sponsorship, what should I do?
A: Here are the steps to follow if a submitter or reviewer has recommended co-sponsorship for a submission:
- Review the co-sponsorship recommendation: Determine if you agree that the submission would be a good fit for co-sponsorship with another unit.
- Contact the co-sponsoring unit's planner:
- Reach out to the planner of the recommended co-sponsoring unit to see if they are interested in co-sponsoring the submission.
- Discuss the details of the submission and get their approval for the co-sponsorship.
- Edit the submission using the instructions above.
Remember that the co-sponsored program will count against the allotment of the unit listed as the first sponsor.
Q: How do I assign an individual submission to a session?
A:
- Log-in to Convention Central.
- Access the Chair Module.
- Click on “Program” in the left side menu.
- If the option to create sessions has been enabled, click the “Create Session” button.
- Enter applicable information for the new session, such as the session title, session type, and program track, then click “Create Session”.
- Complete the information in the “Additional Details” section of the “Details” page.
- Click on “Add Presentations” and select the individual submission module from the dropdown menu.
- A list of submissions from the selected module will appear. Click the checkbox beside each submission you want to add to the session, then click “Add to Session”.
- Click on "List of Presentations" to view all the submissions that have been added to the session.
- Drag and drop the submissions into the desired order.
- Click "Program" > "View" (next to the session) to see the full session details, including the order of the presentations.
- To add assign additional individual submissions to a session, repeat steps 3 to 11.
Refer to the “How to Issue Final Statuses & Organize Sessions” video tutorial (minute marker 5:15) for guidance.
Q: Can planners perform reviews without being assigned as a reviewer?
A: Yes, planners can perform reviews on submissions in which they chair, even if they were not formally assigned as a reviewer. To do this:
- Log-in to Convention Central.
- Access the Chair Module.
- Click on “Review” in the menu on the left side of the screen.
- Select the review module from the dropdown menu.
- Click on “Perform Reviews” in the blue menu bar.
- Identify the submission you want to review and click on the submission #.
- Complete the rubric in the Submit Review section and click on “Submit Review”.
Q: How do I issue final statuses for submissions?
A: Here are instructions on how to issue final statuses for convention submissions. Remember to adhere to the NCA's guidelines and deadlines for issuing final statuses. Failure to do so may result in submitters not receiving their final status notification on time.
- Log-in to Convention Central:
- Access the Chair Module.
- Click on “View Submissions.”
- Select the applicable submission form from the dropdown menu.
- Verify submission details:
- Ensure the accuracy of your slot allotment in the “Additional Information” section by cross-referencing it with the Slot Allotment sheet on the Convention Planner webpage.
- Review Submissions:
- Click on “Review” in the menu on the left side of the screen.
- Select the review module from the dropdown menu.
- Click on “Final Status” in the blue menu bar.
- Assign final status:
- Identify the submission you want to change the final status for and click on “Assign Status” in the “View Submission Reviews” column.
- Select the appropriate status in the “Status” dropdown menu and click on “Assign”.
- Note: For submissions requesting an additional slot, assign a status of “Pending First VP Review” and complete an Additional Slot Request form. Please refer to the Additional Slot Request section for more information.
- Batch assign final statuses (optional):
- Refer to the “How to Issue Final Statuses & Organize Sessions” video tutorial (minute marker 2:15) for guidance on batch assigning final statuses.
- Organize Sessions:
- For session and panel submissions, accepted submissions will automatically be turned into sessions.
- For individual submissions, you will need to group them into sessions manually. Refer to the “How to Issue Final Statuses & Organize Sessions” video tutorial (minute marker 3:30) for guidance.
Q: How do I transfer submissions to Scholar to Scholar or other units?
A: Here’s how you can transfer submissions between units:
- Log-in to Convention Central.
- Access the Chair Module.
- Click on “View Submissions.”
- Select the applicable submission form the dropdown menu.
- Find the appropriate submission and click on the submission number.
- Click on “Edit Submission” in the blue menu bar.
- Select the appropriate unit in which you want to transfer the submission to from the “Unit” dropdown menu and click on “Update Submission.
- The system will trigger an email to the planner who now owns the submission; however, we recommend that you reach out to the planner directly.
IMPORTANT: Scholar to Scholar transfers should not happen until reviews are complete.
Once you transfer a submission, you no longer have access to it unless it is transferred back to you. If the planners determine the Scholar to Scholar submission to be a poor fit, they will transfer the submission back to you and as the program planner, must determine the final outcome for the submission.
Please view the convention planner training III (refer to minute marker 06:03-7:00) for additional guidance or feel free to reach out.
Q: The submitters made an error on their submission, in addition to submitted a paper that wasn’t blind. How do I edit their submission?
A: Here are the steps to edit a submission:
- Log in to the Planner/Chair Module.
- Click on "View Submissions".
- Select the appropriate module from the drop-down menu.
- Click on the submission number in the Session and Panel Submission form section.
- Click on “Edit Submission” in the blue menu bar.
- Make the necessary edits and click on “Update Submission”. You can also upload a new document, if necessary, from this page.
- Click on “Edit Authors” in the blue menu bar to modify authors.
- Click on “Presentations” in the blue menu bar to modify panelists or session presentations.
Q: How do I add a Business Meeting using the Planner Module?
A: Here’s how you can submit your business meeting.
- Log-in to Convention Central.
- Access the Chair Module.
- Click on “Add Submissions.”
- Select “Business Meeting Submission Form” from the “Select Submission Module” dropdown menu.
- On the Add Submission page, enter the Presenter and Submission Details and select “Add Submission.”
- Enter the session details and click on “Update Submission.”
Please view the convention planner training II and IV videos for additional guidance or feel free to reach out.
Q: The sign-up for review form does not ask about people's availability to serve as a chair or respondent. Should I send out a separate email/form for them to indicate this? Is this being considered as part of the implementation process for future conventions?
A: Yes, you will need to send out a separate email/form for this. The NCA Convention team is considering how to add this as a future enhancement. Please email convention@natcom.org sample questions you would like us to consider adding.
Q: How can I ensure that all the reviewers are imported and enlisted from my end?
A: To view a listing of your reviewers, please follow these steps:
- Log-in to Convention Central.
- Access the Chair Module.
- Click on “Review.”
- Select the Review Module from the dropdown menu.
- Click on “Manage Reviewers” in the blue menu.
- View the list of reviewers on the bottom of the screen.
Q: There are reviewers assigned to my unit that wasn’t included in my upload. How do I remove them?
A: You are seeing more people than what’s on your list because folks listed your unit as a preference when signing up via the Call for Reviewers form. If your desire is to not use anyone that isn’t on your list, we ask that you email them letting them know that they were not selected as a reviewer, and remove them by modifying their submission form. Here’s how:
- Log-in to Convention Central.
- Access the Chair Module.
- Click on “Review.”
- Select the Review Module from the dropdown menu.
- Click on “Manage Reviewers” in the blue menu.
- View the list of reviewers on the bottom of the screen, find the person you want to remove, and click on “Edit Sign Up Form”.
- Find your unit in the Unit Preference section and deselect it.
Q: Is there any guidance for handling folks who sign up to review for my unit but indicate it as a unit preference second, third, or fourth choice? Are there any mechanisms for ensuring they aren't overwhelmed with reviews? If our division is 3rd or 4th, should we try not to assign reviews if possible?
A: Thank you for considering the reviewers' workload. Here are our recommendations:
- Review the list of reviewers and check if they have been assigned to multiple divisions. You can find their unit preferences in the Manage Reviewers section by clicking on "Edit Sign Up Form." While it's best to start with those who listed your unit as 1st or 2nd Preference, also consider those who selected your division as 3rd or 4th. There are cases where someone signed up to review for multiple units but may not be selected to do so.
- Evaluate the number of submissions each reviewer has been assigned to and use this information to decide how many submissions to assign them. You can find this information in the Manage Reviewers section.
- If you're worried about overwhelming reviewers with submissions, communicate with them. If they agree with your assessment, consider reassigning some submissions to other available reviewers.
- Keep in touch with reviewers who are completing their assignments promptly. They may be willing to take on additional submissions.
In the past, planners had no way of knowing if a reviewer was assigned to more than one unit. We hope this system will help you make informed decisions.
